Before launching into an overview of what you are seeing in Wwise as a whole, here are the key levels within Wwise you will need to navigate through. Look at the box in the top-left of the screen, called the Project Explorer. The only location in the hierarchy here that should need to be edited is the Interactive Music Hierarchy. Opening out the virtual folders from here, you should see several different types of levels feeding back into each other. Clicking on “music”, near the top of this part of the hierarchy, should show you a screen similar to the one below.
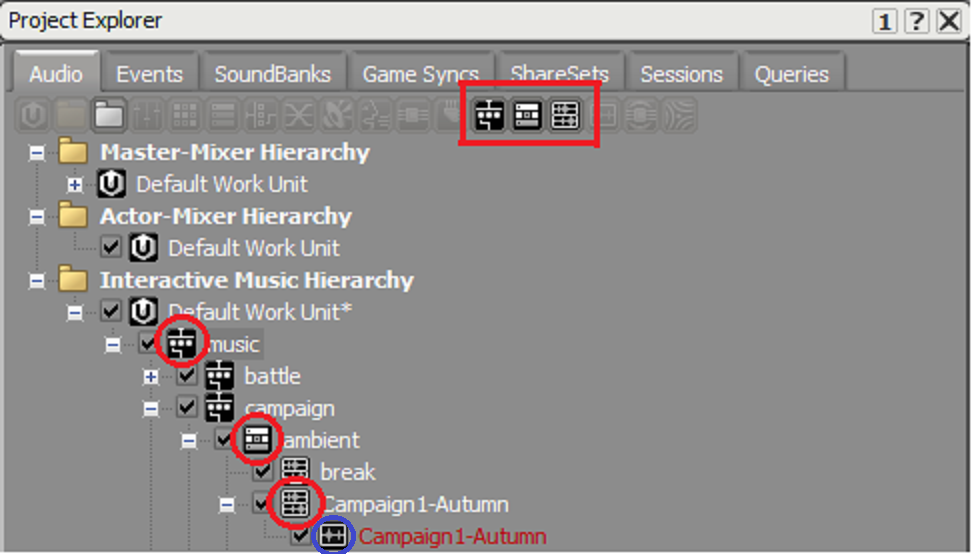
Each type of level has its own symbol, the names of which can be seen by mousing over the corresponding symbol at the top (highlighted in the red box). These are, from top to bottom:
Music Switch Container
Music Playlist Container
Music Segment
Music Track
Each of the first three levels are useful in terms of organizing your music, making it easier to see what goes will go where in game and which parts to edit for effect. As you can see with the initial set-up, it’s fairly plain where to put some stuff already. We will explore what to do with these different levels later on.
The reason I have highlighted Music Track in blue is that when you import your music this will be automatically created for each track. Generally speaking, with one important exception, you will not need to descend to this level during most of your project work.


")

 Reply With Quote


